Showing posts with label DIY. Show all posts

Friday, July 19, 2013

DIY Faux Chalkboard Look

Since the rain has finially slowed down here it is time to for the pool to begin.  And when I saw this quote in the silhouette shop I knew it would be perfect for my soon to be pool area!  I just couldn't decide if I wanted to make it on wood, like a sign or not.  Well when I was shopping in Michaels last week, I found slate pieces and knew that the saying was going on it.

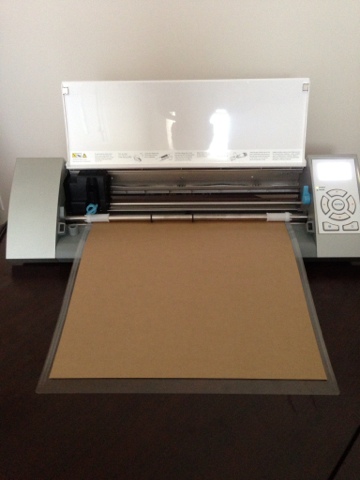
I loaded the quote on the silhouette studio and resized it to fit on the slate piece.  I then cut it out on tan vinyl that I had found on clearance.

After the quote was cut I removed all the letters so I could transfer the whole piece to the slate.
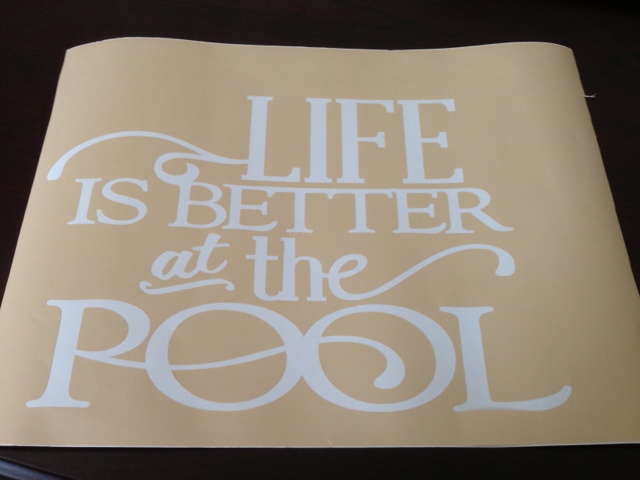

Using clear contact paper I transferred the quote.  Make sure you get any air bubbles or gaps out before taking off the clear contact paper.

Using white craft paint I began painting the letters.

Here it is completely painted.  Make sure to let it dry completely before removing the vinyl template.

After removing the vinyl, I used a sanding block and lightly sanded the whole piece giving it a chalkboard appearance, without using chalk.


This will be the perfect addition to my backyard when it gets completed!!

Saturday, June 29, 2013

DIY Bleached T Shirt

This week at the Silhouette Blog for the Weekly Shape Challenge, the flower ornament design from Hero Arts was chosen for the challenge shape.  I saw the flower and I knew exactly what I wanted to try to make with it.

I loaded the shape and cut it out using my silhouette cameo, onto freezer paper. 


After cutting the shape I placed the flower cut out onto the bottom corner of an old v-neck shirt i had hanging in my closet.  When putting the image that was cut on the fabric, make sure the wax side of the paper is on the fabric, then you will need to iron the pattern so it will stick to the fabric.  I set my iron to medium and the freezer paper stuck to the shirt.


After you have ironed the pattern down, make sure you put something inside the shirt, like cardboard so the bleach doesn't go through to the back of the shirt.
I didn't use straight bleach, I mixed it 75% bleach to 25% water to dilute it some.  I added the bleach and water to a spray bottle and started spraying.  The only advice I would offer is to make sure you spray from a distance if you want the splattered look.  I was a little to close, but it was my first time and an old shirt, and I am still happy with the results.


Here is after I sprayed the bleach mixture on the shirt, I think this was only about 3 minutes after.  I then removed the freezer paper and rinsed out the bleached area.  Then I washed the shirt and hung it up to dry.


This is the shirt after I removed it from the washer to hang to dry.


Here is a close up of the pattern!


Friday, June 28, 2013

A Little Red, White, and Blue

Taking a look at this weeks Weekly Shape Challenge on the Silhouette Blog, and seeing that it could be any project summer themed, I decided that I would make a set of 4th of July coasters.

I picked out the graphics that I wanted to use for this project and sized them down to fit on the coasters.  I loaded the paper and went to getting all the pieces cut out.


I added a thin coating of mod podge to the coaster and put the paper design on the coaster and then added another thin coat of mod podge on top to seal the paper. 


This is right after adding the top coat of mod podge, it was hard to get a picture while doing this step.


Here are all 4 coasters while they were drying.  After they completely dried, I let them sit for about 30 minutes to make sure, I sprayed a coat of clear sealer on the coasters.


When they were completely dry I added felt pieces to the back of each coaster so there will be no scuffing of tables when using these.


Here are the coasters tied up with a bit of twine.  These would make a great gift also, but I think I am going to keep these for myself.


Saturday, June 8, 2013

Easy Glass Etching Tutorial

I get so tired of walking into my girl's bathroom and seeing their stuff all over the counters.  So I decided to make them glasses with their names on them so their things wouldn't get mixed up.

I started out by finding the font I wanted to use with the silhouette studio.  This can be done using sticker letters also.  
I sized them to be proportionate to the glass and then put a square around each name to make it a little easier to make the name straight when adhering.


I loaded contact paper, only because I ran out of vinyl, but I found that for projects where I am just using it as a template it works just as well.
I set the cut settings to vinyl and cut out the templates that I would be using.


One cut, I removed all of the excess contact paper.  I removed the name area and put them on the glasses.


I used armour etch, this can be found at craft stores and I found mine at Hobby Lobby.  I applied the armour etch with a sponge brush to the letter areas.


After applying to all the letters I let the etching cream sit for between 5 to 10 minutes.


Once the 5 to 10 minutes have passed I rinsed off the excess and removed the contact paper, then washed the glass completely.


Here are the completed glasses.  Now maybe my girls can be a little more organized!


Painting a Letter on Burlap

I started this project by picking out my font for the letter "M" and sized it to 7x9.


I loaded a sheet of kraft paper cardstock into my silhouette cameo in order to cut out the stencil that I would need for the project.


Here is the stencil after it was cut out.


I cut the stencil down to an 8x10 size, the same size as the burlap that I would be painting.  I placed the stencil atop the burlap but didn't adhere it in any way.


I held the stencil down and sponge painted the letter.  It might get a little messy when completing this step.


Once I finished painting the letter I immediately removed the stencil to let it dry.  To dry completely it took about 30 minutes.


Here is the completed project.  I put it in a simple black frame and placed it on the table in my entryway.


Sunday, June 2, 2013

A Little Motivation!

For this week's Weekly Shape Challange on the Silhouette Blog, you had a choice to use the weekly free shape or the selected shape, a vinyl phrase by Kolette Hall.   I chose the vinyl phrase because who doesn't need a little motivation sometimes.

I loaded the phrase to my silhouette and sized it down to around 7x9 so it would fit on the 8x10 canvas that I was using.  Once it was ready to cut, I loaded my contact paper only because I ran out of vinyl, and used the settings: media-vinyl, speed-8, thickness-3, blade-2.  I had found the settings online for working with contact paper and it really worked great.


Once everything was cut, I used clear contact paper to transfer the phrase to the canvas.  I used an old gift card I had to to rub across to make sure the letters would stick to the contact paper.


 Then came the time to transfer the letters to the canvas. The canvas was painted gray by one of my girls about a month ago, so I decided to use it, but I painted the bottom part in a tangerine so the work "Awesome" would be a different color.  This is really where everything kinda went wrong, but I was determined to make it work.  I used the gift card to rub across the canvas to make sure the letters would stick, but they didn't, so i had to very carefully lift the contact paper away from the letters.  This process took a while.  I will have to buy some more vinyl so I don't have this problem again.

Well the letters were not adhering to the canvas, so I remember reading somewhere that if you put a light coat of mod podge over the letters that will take care of the problem of paint running under them.  I figured why not!

 Well the mod podge trick worked, so I was able to paint over the phrase with white paint, it took 2 coats.  After letting the paint dry thoroughly it was time to remove the letters.  That was interesting considering I used the mod podge and 2 coats of thick paint, but I got them removed and am very happy with how it turned out!

 Here is the finished project hanging in my home office/craft room!


Saturday, June 1, 2013

DIY Wall Art Part 2


 After seeing the art I made for my wall, my girls told me that they wanted me to make them for their rooms.  I was going to make one for each of the girls with two different colors, but that idea was shot down.  My youngest told me that they needed 2 each since they have queen beds, I got 3 since I have a king and a twin bed would only get one.  I really couldn't argue with her reasoning so I agreed.
I had the colors that wanted me to use, but didn't have enough canvases for them so I had to make a trip to Hobby Lobby.  I was able to buy four 16x20 canvases for a little over $15.  I still don't think that $15 for art for 2 rooms is a bad deal.

This is my youngest's with the colors she wanted, Carmine & Island Blue.


This is my middle daughter's with her colors, Dark Red & Chocolate Brown.

Friday, May 31, 2013

DIY Wall Art

I have been getting a little tired of looking at the bare walls in my house, so little by little I am making different things to decorate.  I started with my bedroom, I wanted something different and unique and that would match the colors in there.

I started off with a blank 16 x 20 canvas, luckily I had several of these in my craft closet.  The only thing that I had to buy was one of the colors of paint, which cost me $1.15.  I used painters tape to make the design and used a gift card to get all the bubbles out from the tape if there was any.


Since I have a large area I made three pictures to hang above the bed.  I didn't want them to be uniform, I wanted them all different. 


Then the paining began.  I just used a sponge brush to paint the canvases.  It took 2 to three coats of paint to get the colors to be just right.


Here are all three canvases after 2 coats, 3 for the middle, of paint.  After they were almost dry I painted the sides, which I really should have done first.  I will definately remember that for any others that I may make.

The colors I used are Lilac, Espresso Bean, and Rainy Day Gray.


Here they are after they dried and I removed the tape.  They aren't perfect, there were a few places that the tape came up and paint got under.  I was just going to let it go, but my ocd kicked in and I had to get the white paint out and fix it.


Here is the finished project.  I am very happy with the way they turned out and for me to only spend $1.15 out of pocket for it was even better.  The whole project only took 2 hours from start to hanging them.  Thank goodness I was able to use supplies that I had gotten from family to make this.


Wednesday, May 15, 2013

Welcome Sign and Post

Being the Pinterest addict that I am I kept seeing the DIY welcome sign and knew that I had to have one for my front porch.    My hubby is anti-tool anything, so lets just say that it was a challenge for me to complete this project, but I did and I am so proud of the results.


I had to go out and buy all the wood and a hand saw, we had nothing but a drill here.  With all the wood I bought, wasn't lucky enough to find scraps, but I will be able to make another post to go around my pool area when it is completed.

Next time I will have a real saw to cut the wood, I already told hubby he was buying me one for a gift, no more hand sawing for me!

Here is the sign on my front porch and some flowers to brighten it up...