Monday, October 14, 2013

Personalized Crown Royal Bottle Soap Dispensers

Lately I have found myself saving all the glass bottles and jars that we use in my house.  While going through them today I decided that the crown royal bottles would make good soap dispensers for my bathrooms!  They look better than the plastic bottles that were already in there.


While I was letting the bottles soak, to easily remove the labels, I thought that the bottles have enough room that I would be able to monogram them with our initial.  So I brought the initial up in the silhouette studio and sized it to fit on the front of the bottle.


While the initials were cutting, I removed the labels and used a little acetone to wipe down the areas where the labels were to ensure there was no glue residue left.


While the bottles were drying I trimmed the initial and put transfer paper, for glass etching I use contact paper to cut the stencil and for the transfer paper, on top for easier placement on the bottles.


I centered the initial the best I could and removed the clear contact paper.


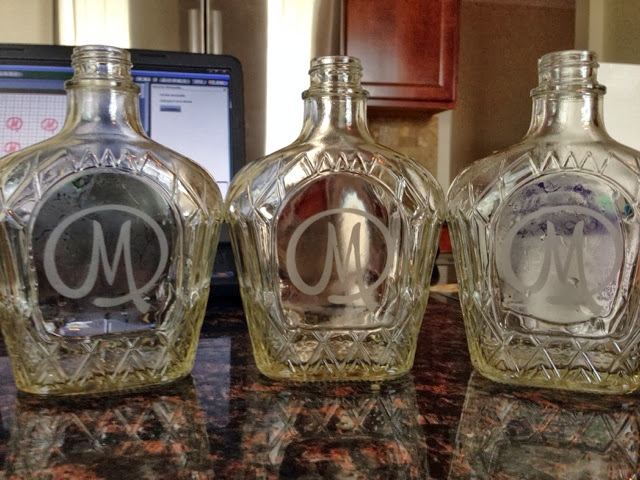
I put a coat of Armour Etch on the stencil and let them set for about 5 minutes.  I them rinsed each bottle and removed the  stencil.


Here are the finished bottles before I added the soap and pumps.  I found that the larger soft soap pumps work great for these bottles.  

This is the soap dispenser I made for my kitchen.


Thursday, September 5, 2013

Ready For Fall

Since the cooler weather is making an appearance around here I decided it was time to decorate for fall!

After seeing this great Fall word art on the Silhouette design studio, I knew that it would be a great addition to my mantel.  I wanted to keep the colors simple so I stuck with a dark brown and white.


Mason jars are everywhere these days, especially the painted and distressed ones.  I thought that they would look awesome in fall colors with some pretty flowers added to them.

I looked at some of the tutorials that people had shared on Pinterest and thought to myself that I should be able to make them too.  I picked out fall colors, orange, brown, and a foliage green to paint them.  The green jar did really well, but I had to work on the brown and orange for a while.  Once the paint dried I used a nail file to distress the jars, then sprayed a clear coat to give some protection to the paint.

I added some greenery and sunflowers, which are my favorite, to complete them. I think that I did pretty good for my first try!


I added an Owl wine cork holder, that I just bought when we went on vacation last week, to the mantel.  

Here is my "Ready For Fall" mantel!


Tuesday, September 3, 2013

The Break Is Over

The end of July and the month of August are always busy at my house!  It seems like there is not enough time to get everything done...  Getting my oldest ready for her second year if college, my middle one got her license and will begin her junior year of high school, and getting my youngest through drivers ed, her driving permit and beginning her freshman year if high school took its toll on me!  

My craft time was practically nonexistent, except for the things my daughter wanted me to make for her dorm room.  I had to make her a new RUN decal for her car, a vinyl saying for her computer, and a message board.


Once we got her moved back in to college my husband decided that we were going to take a short vacation!  This is the first vacation that we have taken in 19 years without the girls!  Thank goodness for the security cameras and the iPhone app that my girls have named "the stalking app", so I could see where they were, and make sure they didn't decide to throw any wild parties or anything!  


The hubby took me to Asheville to visit Biltmore Estates!  It was so nice there!  We toured the house, went through the gardens, did some wine tasting, and shopped some!  I think the best thing was that I didn't have to cook or clean at all!

I got some rest and relaxation so now I am going to craft it up!!